User Spezific Java Script Code
To adapt AvNav to your needs you can extend it with some java script code.
It is possible to define new data displays (widgets) to be placed using the layout editor. In principle you can run any java script code but you have to take care not to disturb the AvNav main functions.
The java script code has to be located at user.js in the directory
BASEDIR/user/viewer.
(e.g. on the pi BASEDIR is /home/pi/avnav/data).
Editing
To simplify working on the code you can directly access the files in this
directory via Files/Download page ![]() , subpage
, subpage ![]() .
.
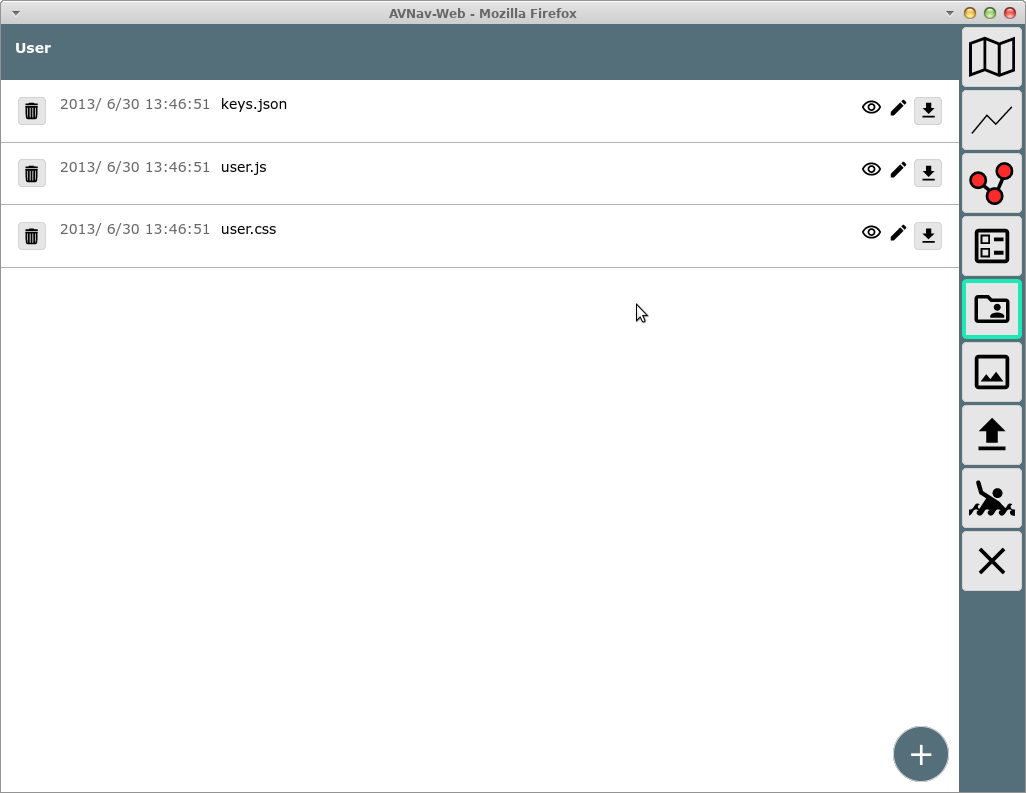
In the screenshot you see a file user.js - initally created from a template on the first start of the server.
By clicking the file and selecting "Edit" from the dialog you can immediately start working on the file.
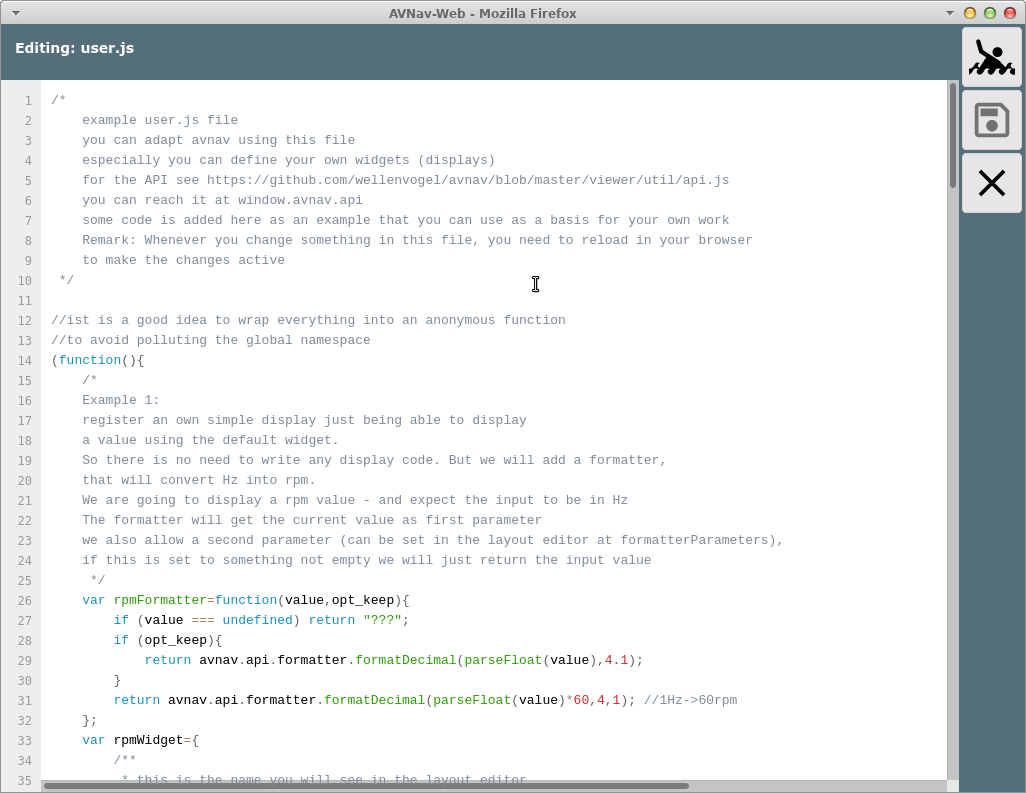
There are a couple of examples already included in the file. They
demonstrate some variants of new widgets. After editing use![]() to store the file and reload AvNav to watch
your changes in action.
to store the file and reload AvNav to watch
your changes in action.
I would recommend to download and backup the file regularily after
editing since there is no version control included in AvNav.
A proven way of editing is the usage of 2 browser windows (or tabs):
- in one window you edit user.js and save it (leaving the window open)
- in the second window you reload AvNav after every save in the first window and test the functionality. The browser developer tools can assist you by displaying errors - and you can even debug your code.
Using the workflow you can implement changes rather fast.
The current file template you can also find on github.
Widgets
You can add the following types of widgets:
- widgets with an own formatter (and potentially fixed values retrieved from the store) based on the default widget (example 1- user.js: rpmWidget, testPlugin: testPluing_simpleWidget)
- adaptations and extensions of the graphics widgets (canvas
gauges) (example 2 - user.js:
rpmGauge)
This way you can access canvas widget parameters that are currently not directly accessible. - widgets with own HTML code (example 3 - user.js: userSpecialRpm, TestPlugin: testPlugin_courseWidget)
- widgets with canvas graphics (example within the TestPlugin: testPlugin_courseWidget)
- widgets with own HTML that are communicating with the server part of a plugin (TestPlugin: testPlugin_serverWidget
- widgets that will draw graphics on the map (type: map) - since 20220819 e.g. SailInstrument
The interface to communicate with AvNav is available at github and in the example code.
For map widgets you can access the underlying libraries for geographical computations via the API (functions LatLon and Dms).
Canvas Gauges
For canvas gauge widgets you can set some parameters (see canvas gauges description) either to fixed values (in this case they must become part of the widget definition - see the values in the example starting from line 134) or you can make them settable by the user within the layout editor (put them into the editable widget parameters - example starting from line 156).
Additionally you can define an own formatter and set it as default for the widget.
If you would like to hide some predefined parameters in the layout editor you need to set them to "false" in the editable parameters.
For every gauge widget you need to provide the parameter "type" - either
"radialGauge" or "linearGauge".
Additionally they have the parameter
This parameter controls whether the value is displayed as numeric (additionally) or not. The original parameter "valueBox" from canvas gauges is ignored!
Beside the parameters you can also define a translateFunction. This function receives an object with all the current values and can modify this before it is set at canvas gauges(example from line 104). This function needs to be "stateless". That means the output must only depend form the input or any other fixed values. Otherwise some changes potentially will not been drawn.
Own Widgets
For an own widget the following functions/properties can be implemented:
| Name | Type | Usable for type | Description |
| name | String | all | the name of the widget as displayed in the layout editor |
| type | string (optional) |
alle | defines which type of widget should be created Values: radialGauge, linearGauge, map If you don't set the type either the default widget will be used (no renderHtml and no renderCanvas provided) or a special userWidget will be used. |
| renderHtml | function (optional) |
userWidget | This method must return a string containing valid HTML. It will be
injected into the widget. To attach event handlers to your elements
you have to register them (see initFunction). In the HTML you will
assign them with: <button onclick="myHandler">Click!</button>
Note that is is not exactly strict HTML as you only provide the name
of the event handler - no java script code! The "this" inside renderHtml refers to the widget context (an object that is specific for the particular widget). If the event handler is called, the "this" will also point to the context. The parameter of renderHtml contains all parameters of the widget and the values defined at storeKeys. The function will be called every time the values change. |
| renderCanvas |
function (optional) |
userWidget, map |
With this function you can draw to the provided canvas object. The second parameter of renderCanvas contains all parameters of the widget and the values defined at storeKeys. The function will be called every time the values change. The "this" inside renderCanvas refers to the widget context (an object that is specific for the particular widget). For map widgets this canvas is an overlay on the map. At the widget context you have functions to convert between coordinates and canvas pixels. it is important to correctly handle the canvas with save/restore as all map widgets share the same canvas. |
| storeKeys |
object | all | You have to provide the data to be read from the internal store
serving as parameters for the renderXXX function. |
| caption | string (optional) |
all | A default caption. |
| unit | string (optional) |
alle | A default unit |
| formatter | function (optional) |
defaultWidget, radialGauge, linearGauge |
A formatter for the value. For the defaultWidget this function is mandatory. |
| translateFunction | function (optional) |
alle | This function is called with the current values as parameters and
must return an object containing the derived values. This may be used to transform values before rendering if no own renderXXX is implemented - see example. |
| initFunction | function (optional) |
userWidget, map |
If defined, this function will be called once after creating the
widget before any renderXXX function. The widget context is provided
as a parameter and as the "this" variable. The widget context has an eventHandler Property. Here you have to define all event handlers to be used in your HTML code. With a triggerRedraw function that is also available at the context you can force a new rendering of the widget causing the renderXXX functions to be called again. Starting with version 20210422 the init function will receive a second parameter that has the properties of the widget (including all parameters that you defined as editable widget parameters). |
| finalizeFunktion | function (optional) |
userWidget, map |
If defined, this function will be called before the widget is
removed. The "this" refers to the widget context. Additionally the
context will also provided as the first parameter (like in the
initFunction). Starting with version 20210422 the init function will receive a second parameter that has the properties of the widget (including all parameters that you defined as editable widget parameters). |
The following global variables are set for the java script code:
| Name | plugin.js/user.js | Decsription |
| AVNAV_BASE_URL | both | The URL to the directory from where the java script code has been
loaded. This can be used to load other elements from there. From
user.js you can access files from the images directory with
AVNAV_BASE_URL+"../images". AVNAV_BASE_URL+"/api" will give you the base URL for plugins to maintain communication with the python side. |
| AVNAV_PLUGIN_NAME | plugin.js | The name of the plugin. |
After defining a widget you need to register it at AvNav (avnav.registerWidget).
Widget Context
User widgets and map widgets will receive a widget context. This will be created for every instance of a widget and will be provided to the following functions:
- initFunction (this and first parameter)
- finalizeFunction (this and first parameter)
- renderHtml (this)
- renderCanvas (this)
To make the access to "this" inside the functions working they need to be defined the classic way with "function" - not as arrow functions.
Correct:
renderHtml: function(context,props){
return "<p>Hello</p>";
}
}
Inside the widget context you can store user data that will be
needed in consecutive function calls.
Additionally it contains a couple of functions you can use in your widget
code.
| Name | Widget | Parameter | Description |
| eventHandler | userWidget | --- | eventHandler is not a function but just an object. If you have
event handlers inside your rendered HTML you need to provide the
handler function there. E.g.: renderHtml returns <button onclick="clickHandler"/> - you need to register a function "clickHandler" here. this.eventHandler.clickHandler=function(ev){...} See TestPlugin. |
| triggerRedraw | userWidget | --- | This function needs to be called if the widget would like itself
to be redrawn (e.g. after communicating with a server). See TestPlugin. |
| lonLatToPixel | map | lon,lat | Converts longitude, latitude into pixel coordinate for the
renderCanvas. Returns an array [x,y]. |
| pixelToLonLat | map | x,y | Computes longitude and latitude from the canvas coordinates x and
y. Returns an array [lon,lat]. |
| getScale | map | --- | Returns the scale factor for the display. High resolution displays normally have a scale factor > 1. You should adapt the dimension of your drawings (especially texts) depending on this scal factor. |
| getRotation | map | --- | Returns the current map rotation (in radians!) |
| getContext | map | --- | Returns the renderingContext2D of the canvas (only active inside the renderCanvas function) |
| getDimensions | map | --- | Returns the width and height of the canvas ([width,height]). |
| triggerRender | map | --- | Same functionality like triggerRedraw at the userWidget. |
Widget Parameters
When you register a widget you can provide a second parameter - an object containing parameters to be displayed in the layout editor.
Examples can be found in the user.js
template. Values selected by the user in the Layout editor will
become part of the properties provided to the renderHtml and renderCanvas
functions (except for parameters of type KEY: the values read from the
store will be provided).
For each of the parameters you can provide the following properties:
| Name | Type | Description |
| key | The name of the parameter as to be displayed in the layout editor and as to be available for the renderXXX functions. | |
| type | string | STRING, NUMBER, FLOAT, KEY, SELECT, ARRAY, BOOLEAN, COLOR The type of the parameter. Depending on the type a different user dialog will be shown: for COLOR this will be a color selector, for SELECT a select list and for KEY the list of known items in the global store. For an array you can provide a list of values, separated by comma. |
| default | depending on type | The default value. For COLOR a color css property - like "rgba(200, 50, 50, .75)" |
| list | Array (only for type SELECT) |
An array of strings or objects {name:'xxx',value:'yyy'} - they
will be displayed in the select list. Instead of the array you can provide a function that returns the array - or a Promise that returns the array in resolve. |
There are some predefined parameters for the layout editor. For those no describing object with properties should be provided, just true or false (this defines whether or not they will be prompted in the layout editor).
Those are:
- caption (STRING)
- unit (STRING)
- formatter (SELECT)
- formatterParameters (ARRAY)
- value (KEY)
- className (STRING)
An example definition:
Formatter
Beside the widgets you can implement your own formatters preparing values
for display.
Many formatters already are available in the system - see Layout
Editor.
Since version 20210106 you can register your own formatters in AvNav and,
by this, make them available to all other widgets. Basically a formatter
is a function accepting the value to be formatted as first parameter and
returning a string result.
The length of the string should be constant and independent from the
current value (use space padding if necessary). This is to avoid
interfering with automatic sizing on dashboard pages.
A formatter can accept additional parameters to control the output. Those parameters can be set with the widget property "formatterParameters" - typically in the Layout Editor.
Example:
registerFormatter will throw an exception if a formatter with the same name already exists.
Each formatter function should carry a "parameters" property. This property describes the values presented to the user in the layout editor as formatterParameters. The values in this definition follow the same syntax as for editable widget parameters.
Libraries and Images
Images and libaries uploaded to the same directory can be accessed by
your java script code. Images additionally can be accessed in the images ![]() directory.
directory.
Embedding of libraries can be done like this:
I recommend to assign css classes to your own widgets providing easy means of adapting their look and feel later on by user defined CSS. You should not use HTML ids in your code as the widgets might be instantiated multiple times on one page.
If you need to download data from the server I recommend using fetch. All files in the user directory (or the plugin directory for plugin.js) can be accessed with AVNAV_BASE_URL+"/"+name.
If you need to create an additional file in the user directory (e.g. text or HTML) you can directly do this using the "+" button (lower right) - afterwards you can directly edit the file.
Feature Formatter
Since version 20210114 you can register functions to convert and format
data from overlay files for the "Feature Info" dialog.
You can implement them in the user.js or by a plugin.
With
you register such a function. For details refer to Overlays.